Migrate From Sonarr and Radarr
This guide walks through moving a Sonarr and Radarr setup into Scryer, including layouts with separate 1080p and 4K instances. Keep the existing apps running during the migration — Scryer scans their configuration and library roots.
Migration order
Section titled “Migration order”- Connect every Sonarr, Radarr, and Prowlarr instance to migrate.
- Let Scryer scan their source roots.
- Create libraries and map each source root into one.
- Choose a quality profile and persona for each library.
- Choose the download clients and indexers to bring across.
- Review the summary, finish the import, and check the result before retiring the old stack.
Connect Your Arr Instances
Section titled “Connect Your Arr Instances”Add the URL and API key for every Sonarr and Radarr instance you use. Multiple instances of the same app are supported, so add both sides of a split setup such as 1080p and 4K.
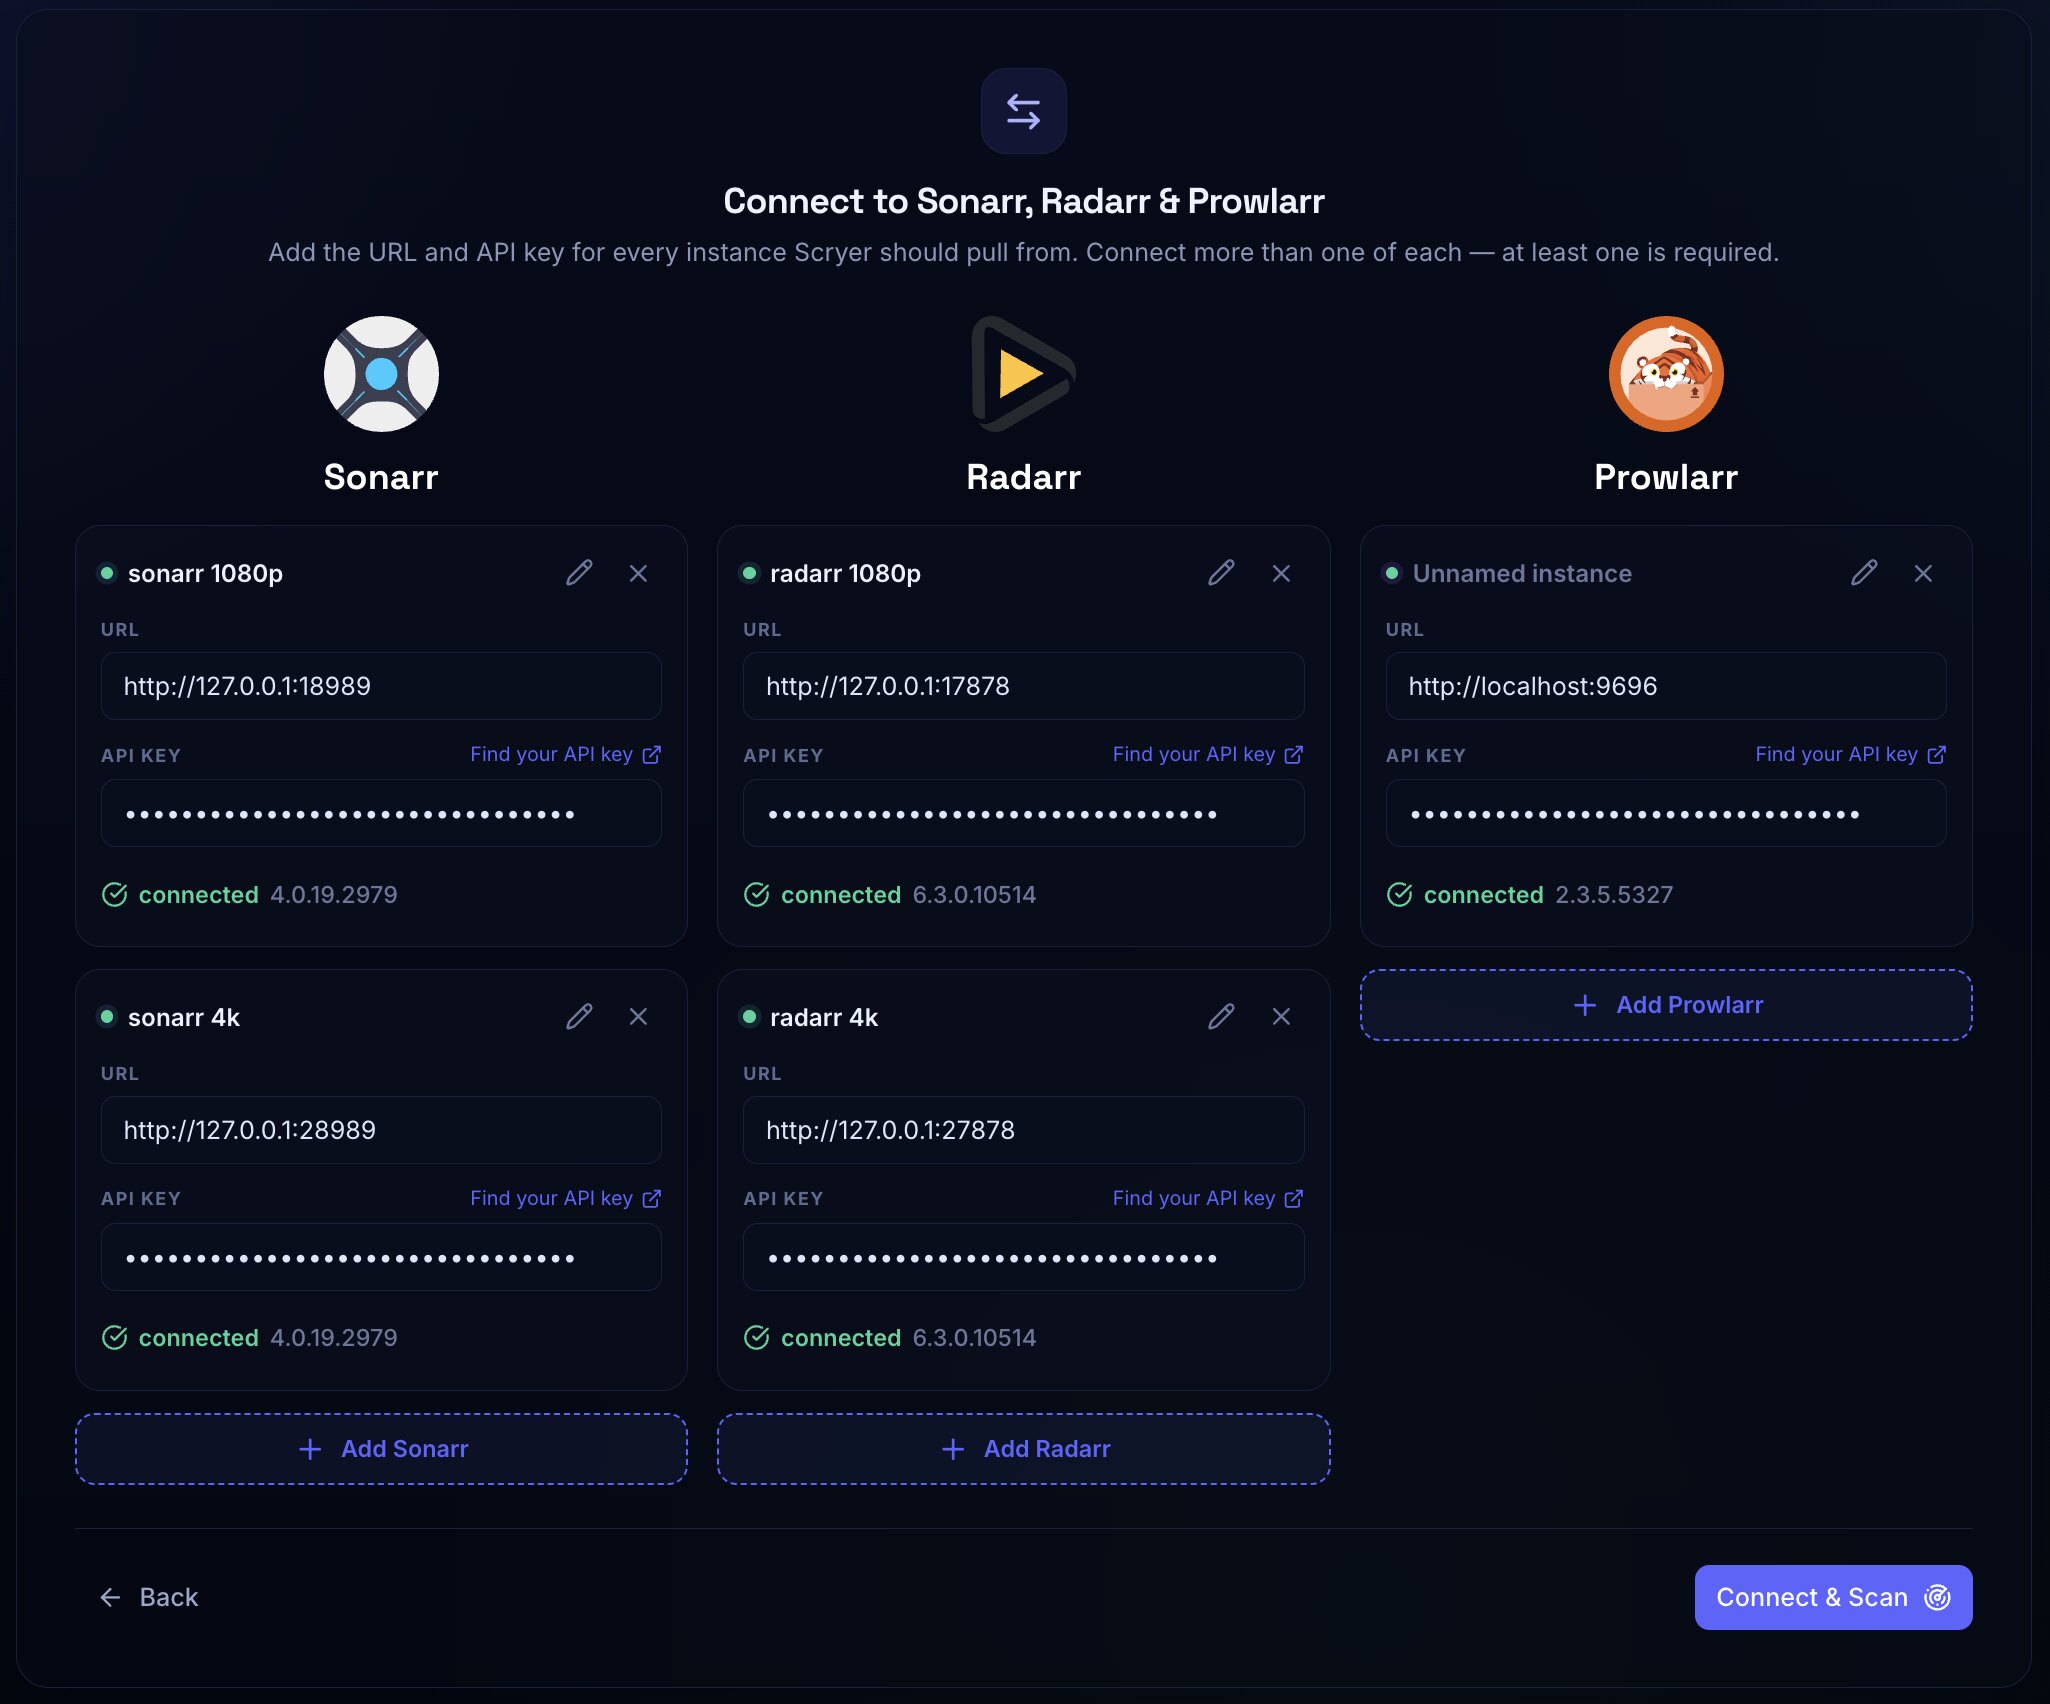
For each instance:
- Give it a recognizable name, such as
Sonarr 1080porRadarr 4K. - Enter its base URL — the address Scryer can reach, which may differ from the one in your browser.
- Paste the API key from the app’s Settings → General page.
Use Add Sonarr, Add Radarr, or Add Prowlarr for each additional instance. Each connection is tracked separately, so every imported root and setting keeps its source. Every one is optional.
When everything is connected, select Connect & Scan.
Create Libraries And Map Source Roots
Section titled “Create Libraries And Map Source Roots”After the scan, Scryer lists the discovered root folders under Source roots. Create a library for each way you want to organize content, then place every source root in one.
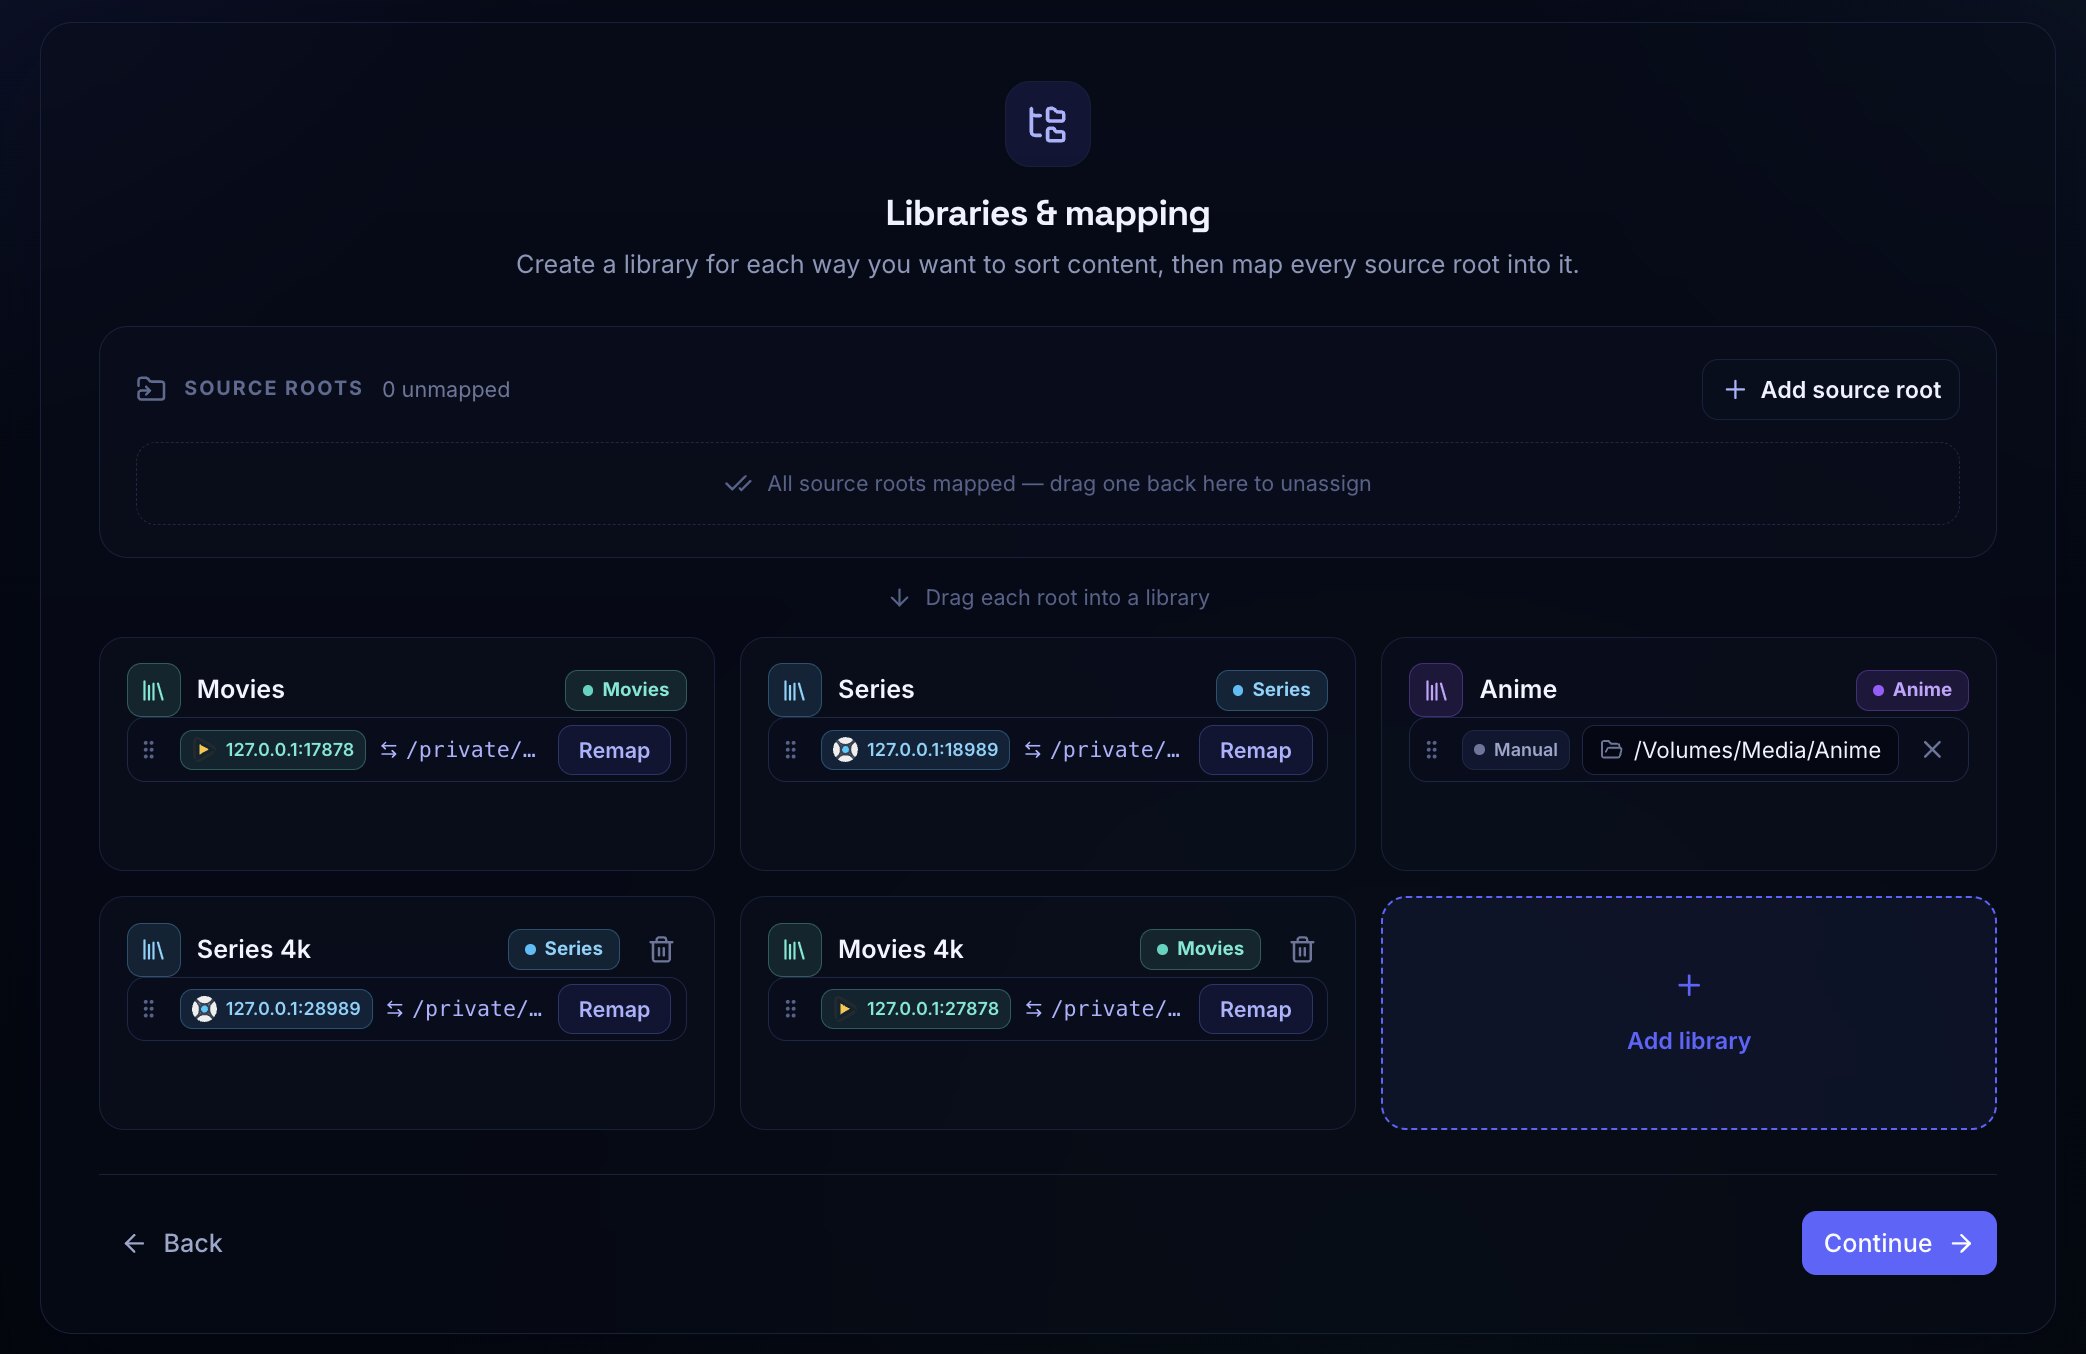
For a split-resolution setup, mirror the boundaries you want to keep:
- Series for the standard Sonarr root.
- Series 4K for the 4K Sonarr root.
- Movies for the standard Radarr root.
- Movies 4K for the 4K Radarr root.
Another way to split is logically (or do a mix of both)
- Movies for standard movies
- Anime Movies for anime films
Segmenting this way can be useful for Discovery as that is scoped per Library and therefore can give you more contextual recommendations.
Drag each source root from the top section into its library. A mapped root shows its source instance and path in the library card. The Source roots counter should read 0 unmapped before you continue.
Remap A Source Path
Section titled “Remap A Source Path”Choose Remap when the path reported by Sonarr or Radarr differs from the path Scryer can access — for example, an Arr container reports a Docker-internal path while Scryer sees the same files through a host or network mount. Map the source path to its Scryer-visible equivalent before moving on.
Use Add source root for a root no connected app supplies, and Add library for another destination.
Separate resolution-specific libraries are only needed if you want separate policies. If your instances were split just for convenience, map their roots into one library instead.
Choose Quality Profiles And Personas
Section titled “Choose Quality Profiles And Personas”Next, choose a Quality profile and Persona for each library. These are per-library choices, so a standard library can behave differently from its 4K counterpart.
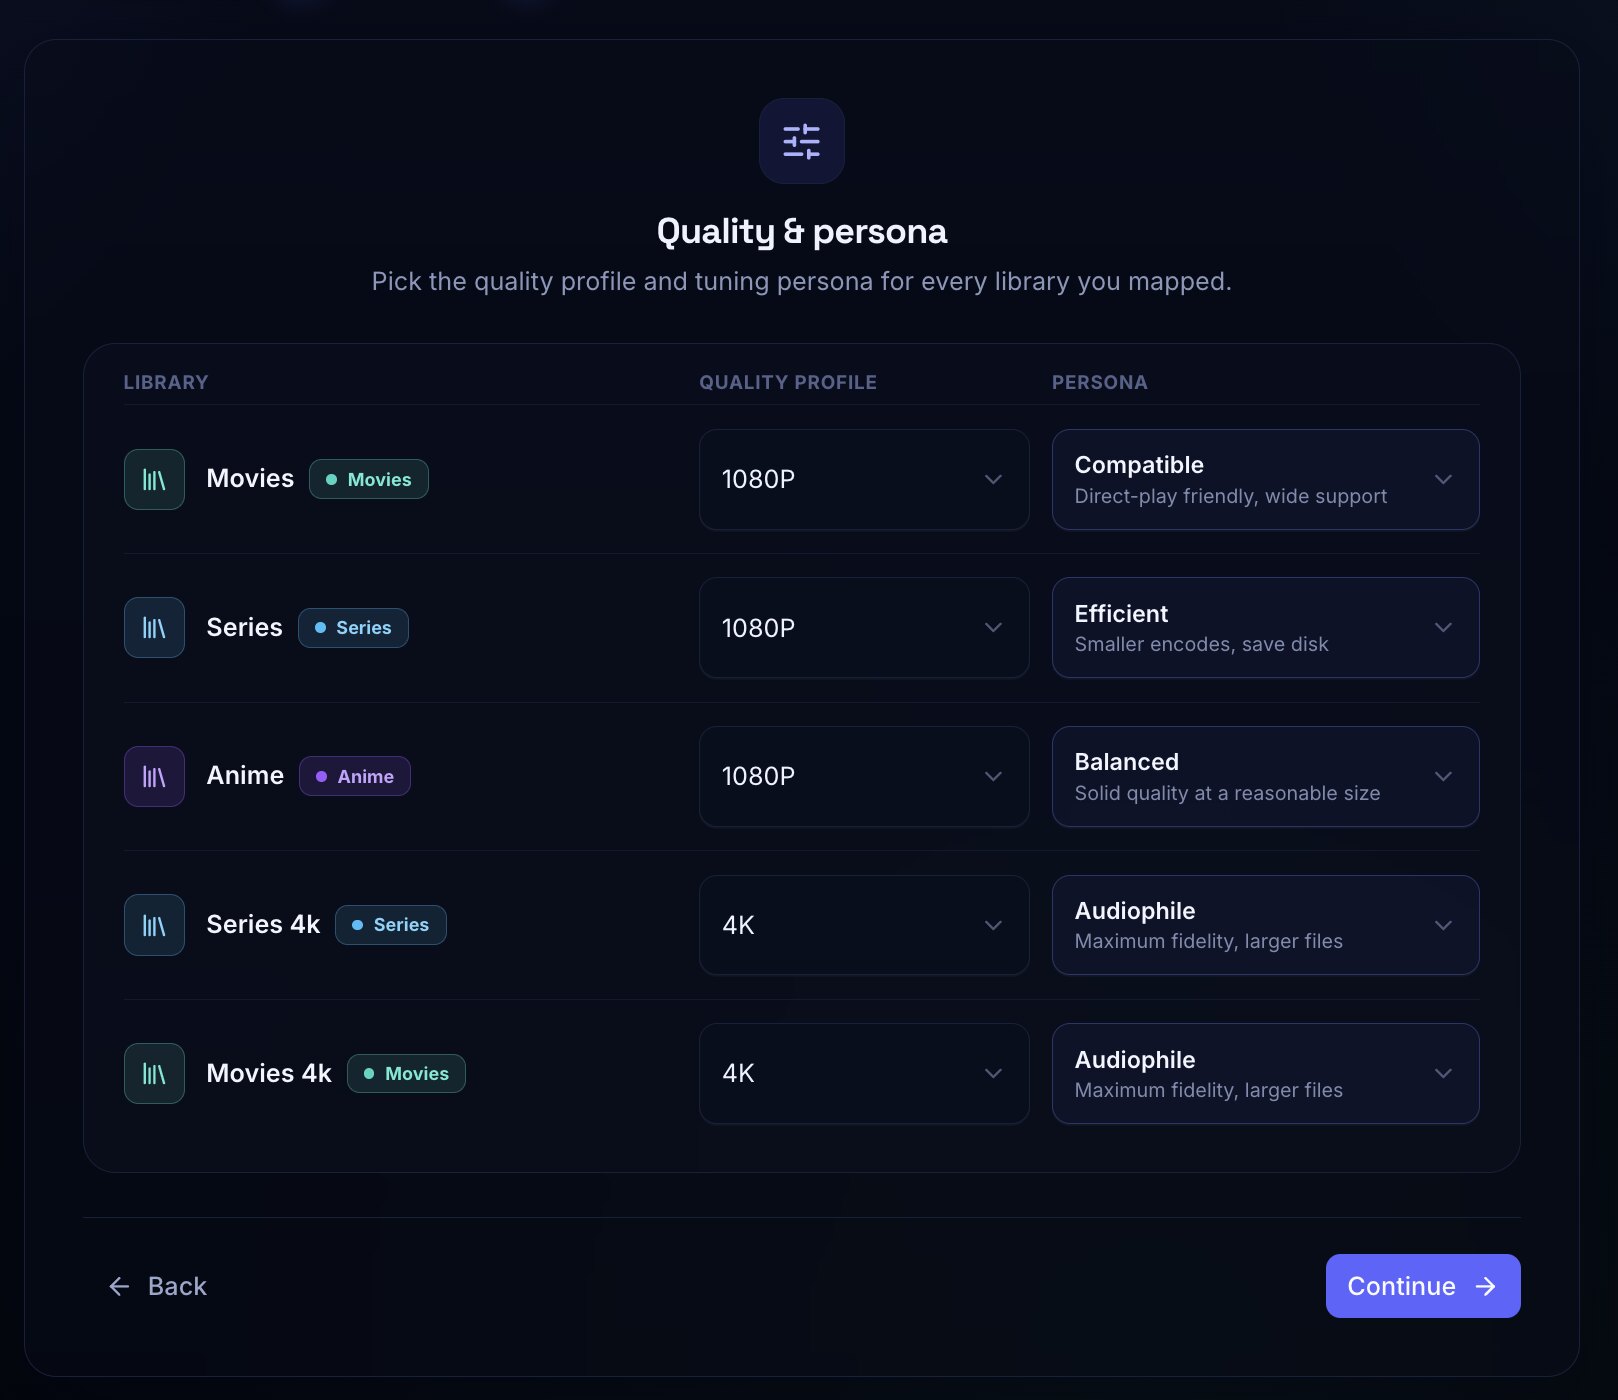
The quality profile sets the library’s quality target — a 1080p profile for standard libraries, a 4K profile for dedicated 4K libraries.
The persona tunes the library for the viewing experience you want. The wizard describes each option as you select it:
- Compatible for direct-play-friendly choices and broad support.
- Efficient for smaller encodes and lower disk usage.
- Balanced for a middle ground between quality and size.
- Audiophile when maximum fidelity is the priority and larger files are acceptable.
The selections in the screenshot are examples, not a required layout. Pick whatever fits each library’s purpose — both settings can be changed later in the library settings.
Choose Clients And Indexers
Section titled “Choose Clients And Indexers”Scryer now shows the download clients and indexers it found on the connected instances. Select the ones to bring across.
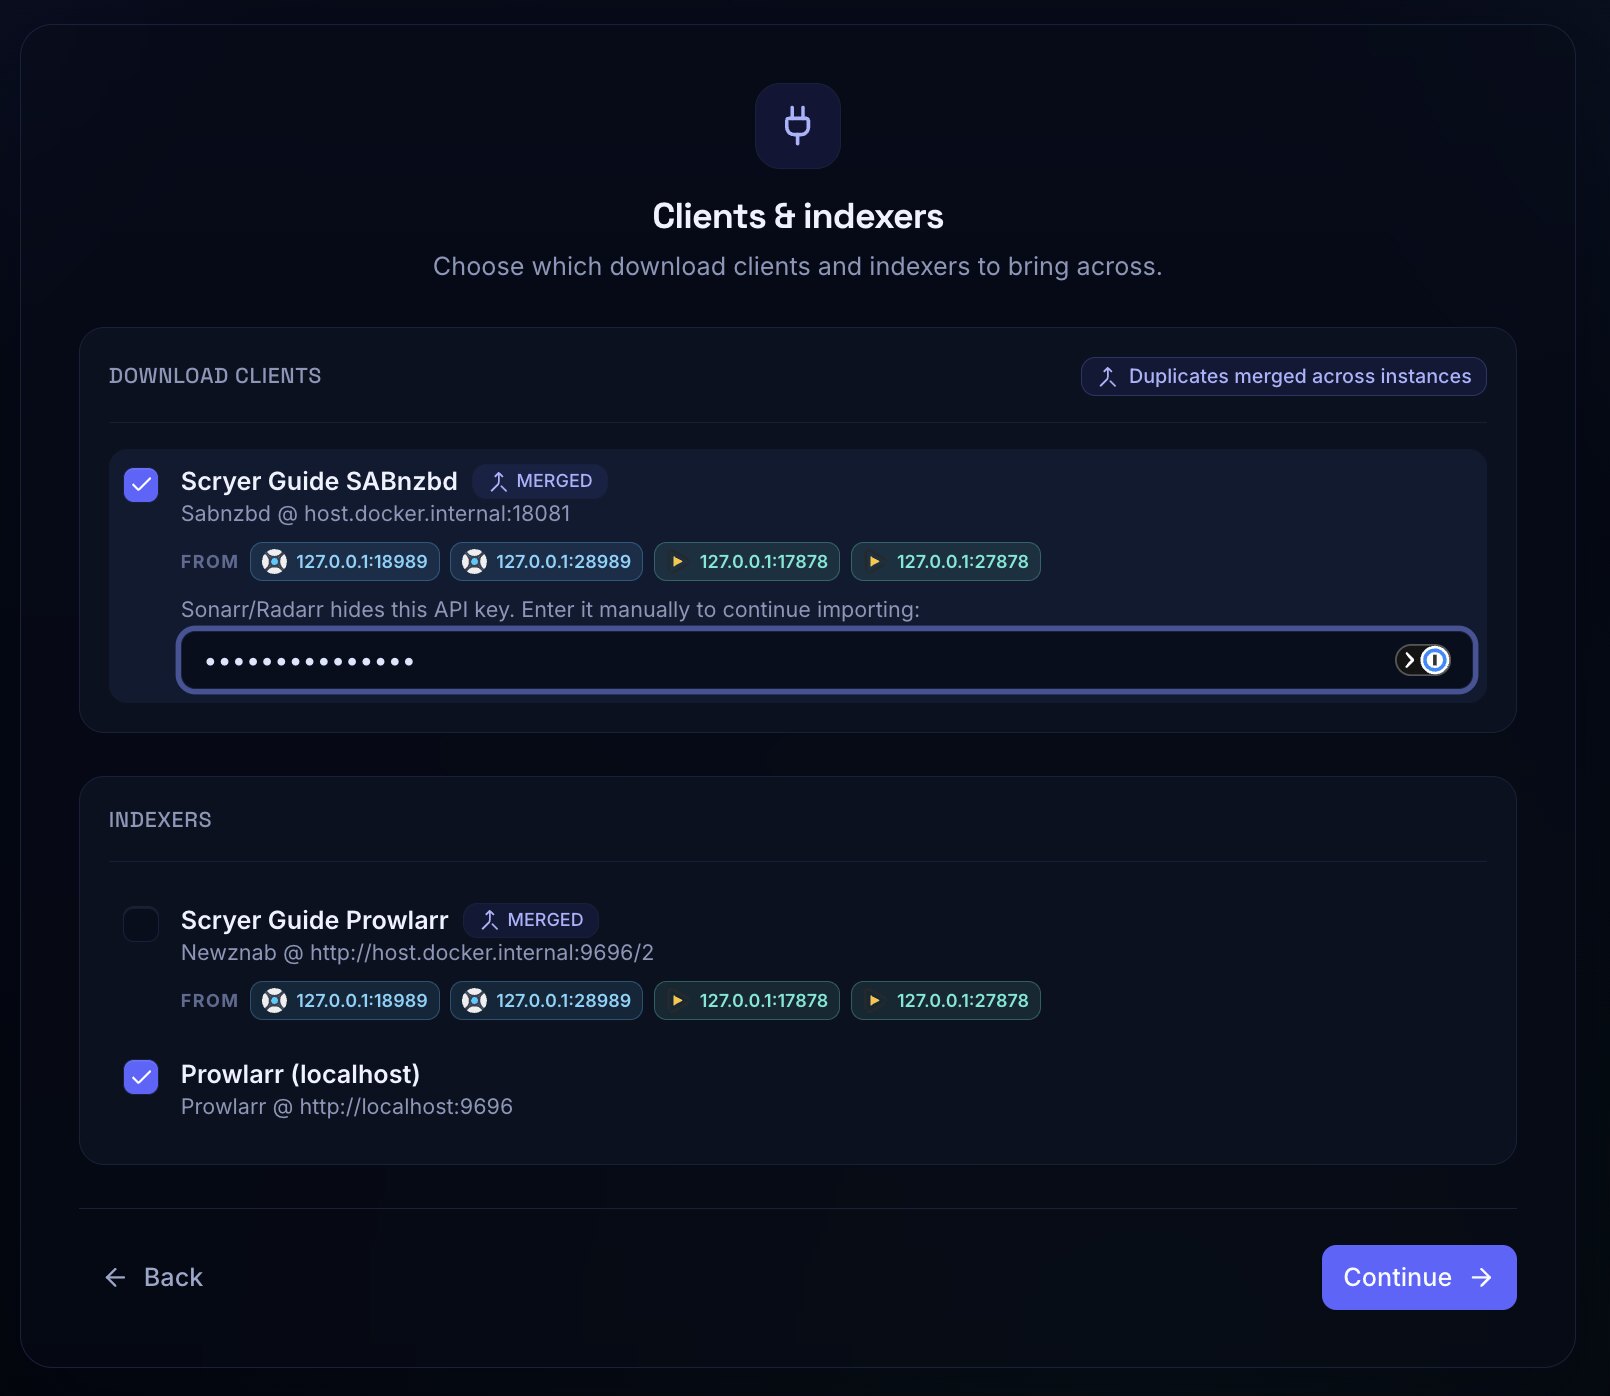
Configurations shared by multiple instances are merged into a single entry — the Merged badge and source chips show where each came from.
- For a shared download client, select the one merged entry rather than recreating it per instance.
- Sonarr and Radarr do not expose download-client API keys, so enter the key for each selected client in the field shown.
- Supported indexers are listed separately. If you connected Prowlarr directly, select its Prowlarr entry; the per-app proxy entries are shown for context and do not need to be selected too.
- Leave anything you do not want Scryer to manage unchecked — you can add it later.
When the selections match your intended setup, choose Continue.
Review And Finish The Import
Section titled “Review And Finish The Import”The final screen summarizes everything Scryer is ready to import.
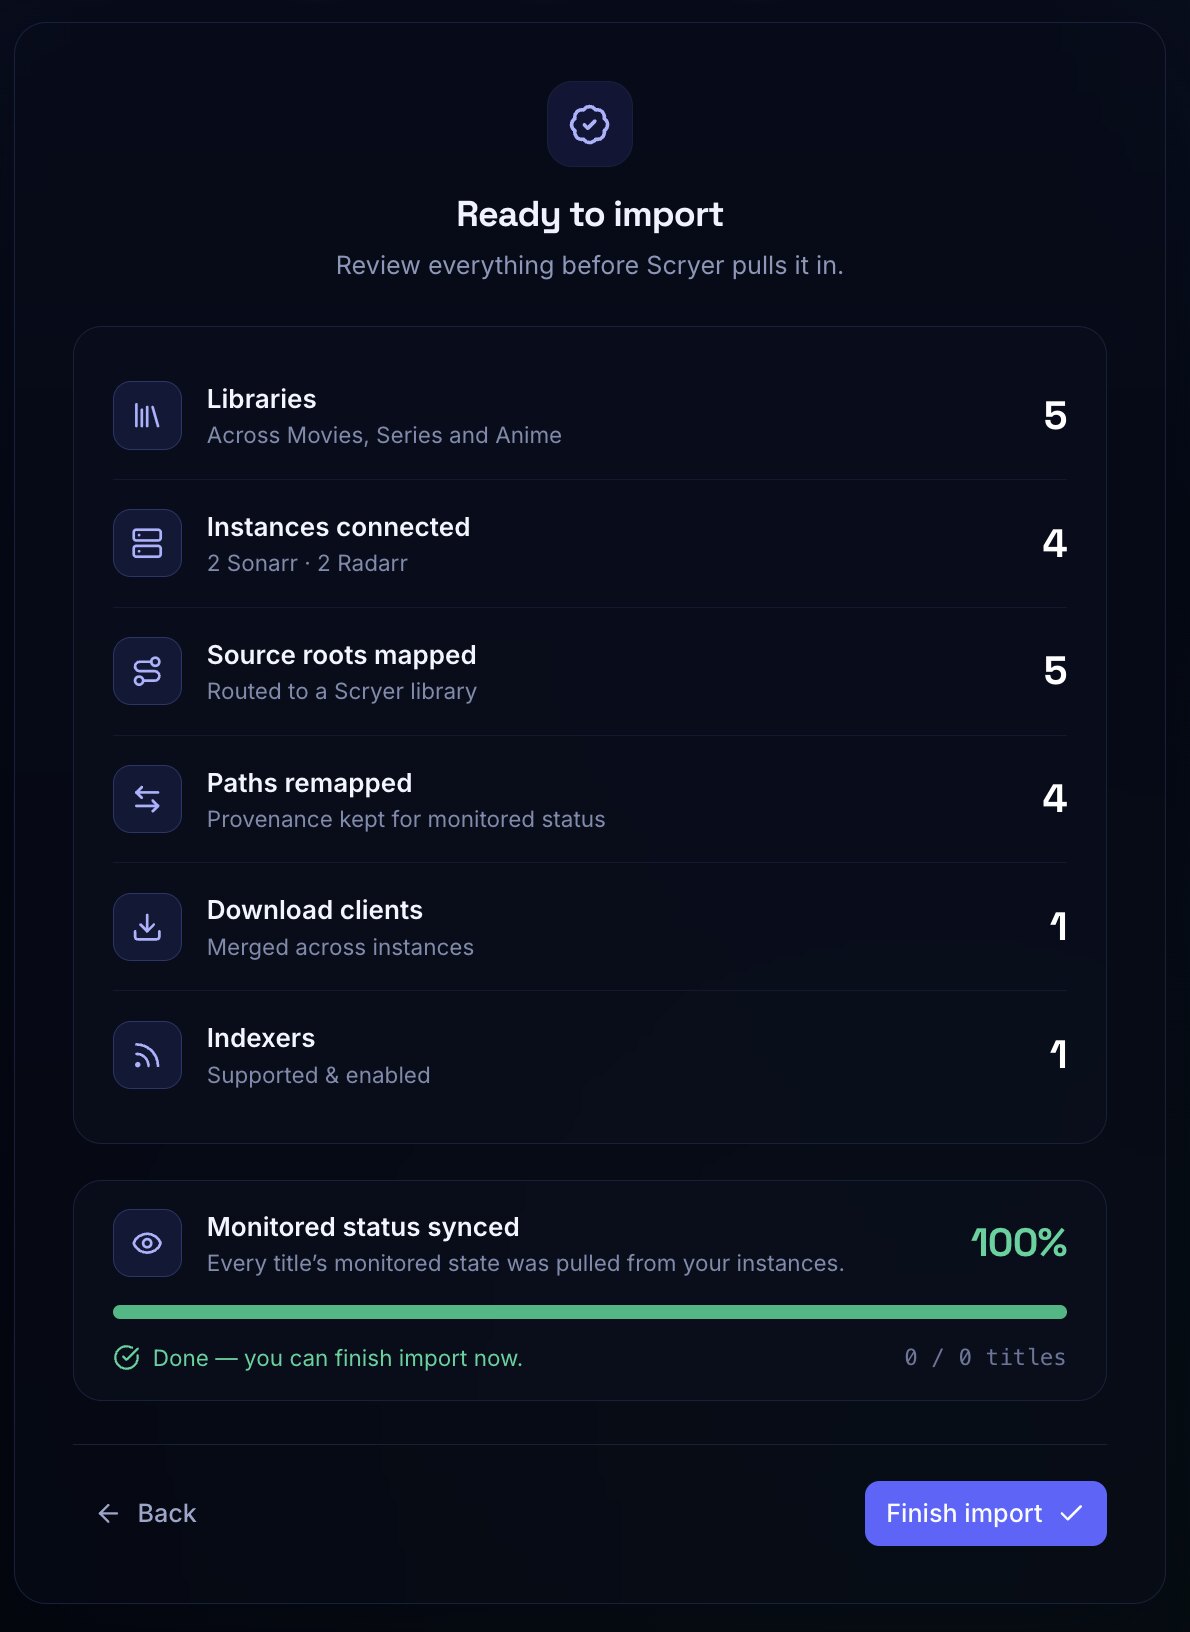
Check the counts against your setup:
- Libraries should match the libraries you created.
- Instances connected should include every Sonarr and Radarr instance you are migrating.
- Source roots mapped and Paths remapped should reflect the mappings and path translations you set up.
- Download clients counts merged entries across the connected instances.
- Indexers counts the supported, enabled indexers found during the scan.
- Monitored status synced confirms Scryer read the monitored state from the source instances.
If a count looks wrong, use Back to fix the connection, mapping, or library settings. When the summary looks right, select Finish import.
Keep Sonarr and Radarr running until you have confirmed the catalog, monitored state, and settings look right in Scryer.
Next Steps
Section titled “Next Steps”- Library Layout explains how Scryer organizes media roots and completed-work staging.
- Installation covers configuration details you may still need after the import.
- Compare Scryer With Sonarr and Radarr explains the broader product differences.